Splints & Fracture First Aid: Immobilisation Guide

Reviewed by the Medibc First Aid Team — last updated April 2026.
Around 170,000 Australians are admitted to hospital each year with a fracture, and many more present with sprains and dislocations that look just as serious in the field. A well-applied splint or sling is the difference between transporting a patient comfortably to hospital and making a bad break worse.
This guide walks Australian first aiders, parents, and outdoor adventurers through the splint and sling choices for common fractures and sprains, the step-by-step technique for immobilising arms and legs, and the warning signs that mean a higher level of care.
When to splint: recognising a fracture or dislocation
The general rule: if you can’t rule out a fracture, treat it like a fracture. Splinting a sprain that turns out to be intact does no harm; failing to splint a real fracture can cause nerve damage, blood vessel injury, and chronic deformity.
Signs that need splinting
- Visible deformity — bone at the wrong angle, lump where there shouldn’t be one.
- Severe pain on movement or weight-bearing.
- Crepitus — the grating feeling or sound of bone ends.
- Rapid swelling and bruising.
- Inability to move the limb in a normal range.
- Loss of pulse, sensation, or colour below the injury — urgent.
What about open fractures?
An open (compound) fracture — where the bone has broken the skin — needs the wound covered with a sterile dressing first, then splinted around it. Don’t push the bone back in. Call triple zero (000).
Choosing the right splint for the injury
Different injuries need different splint shapes. The wrong splint either doesn’t immobilise properly or makes the patient’s pain worse.
Aluminium foam splints
Mouldable, lightweight, X-ray translucent. Cut to length with scissors, bend to follow the limb’s angle, secure with bandage. The most versatile splint — fits arms, legs, fingers, and the occasional improvised neck collar. A 90cm folded aluminium foam splint covers most adult forearm and lower-leg fractures. For children, the junior 45cm splint is the right size.
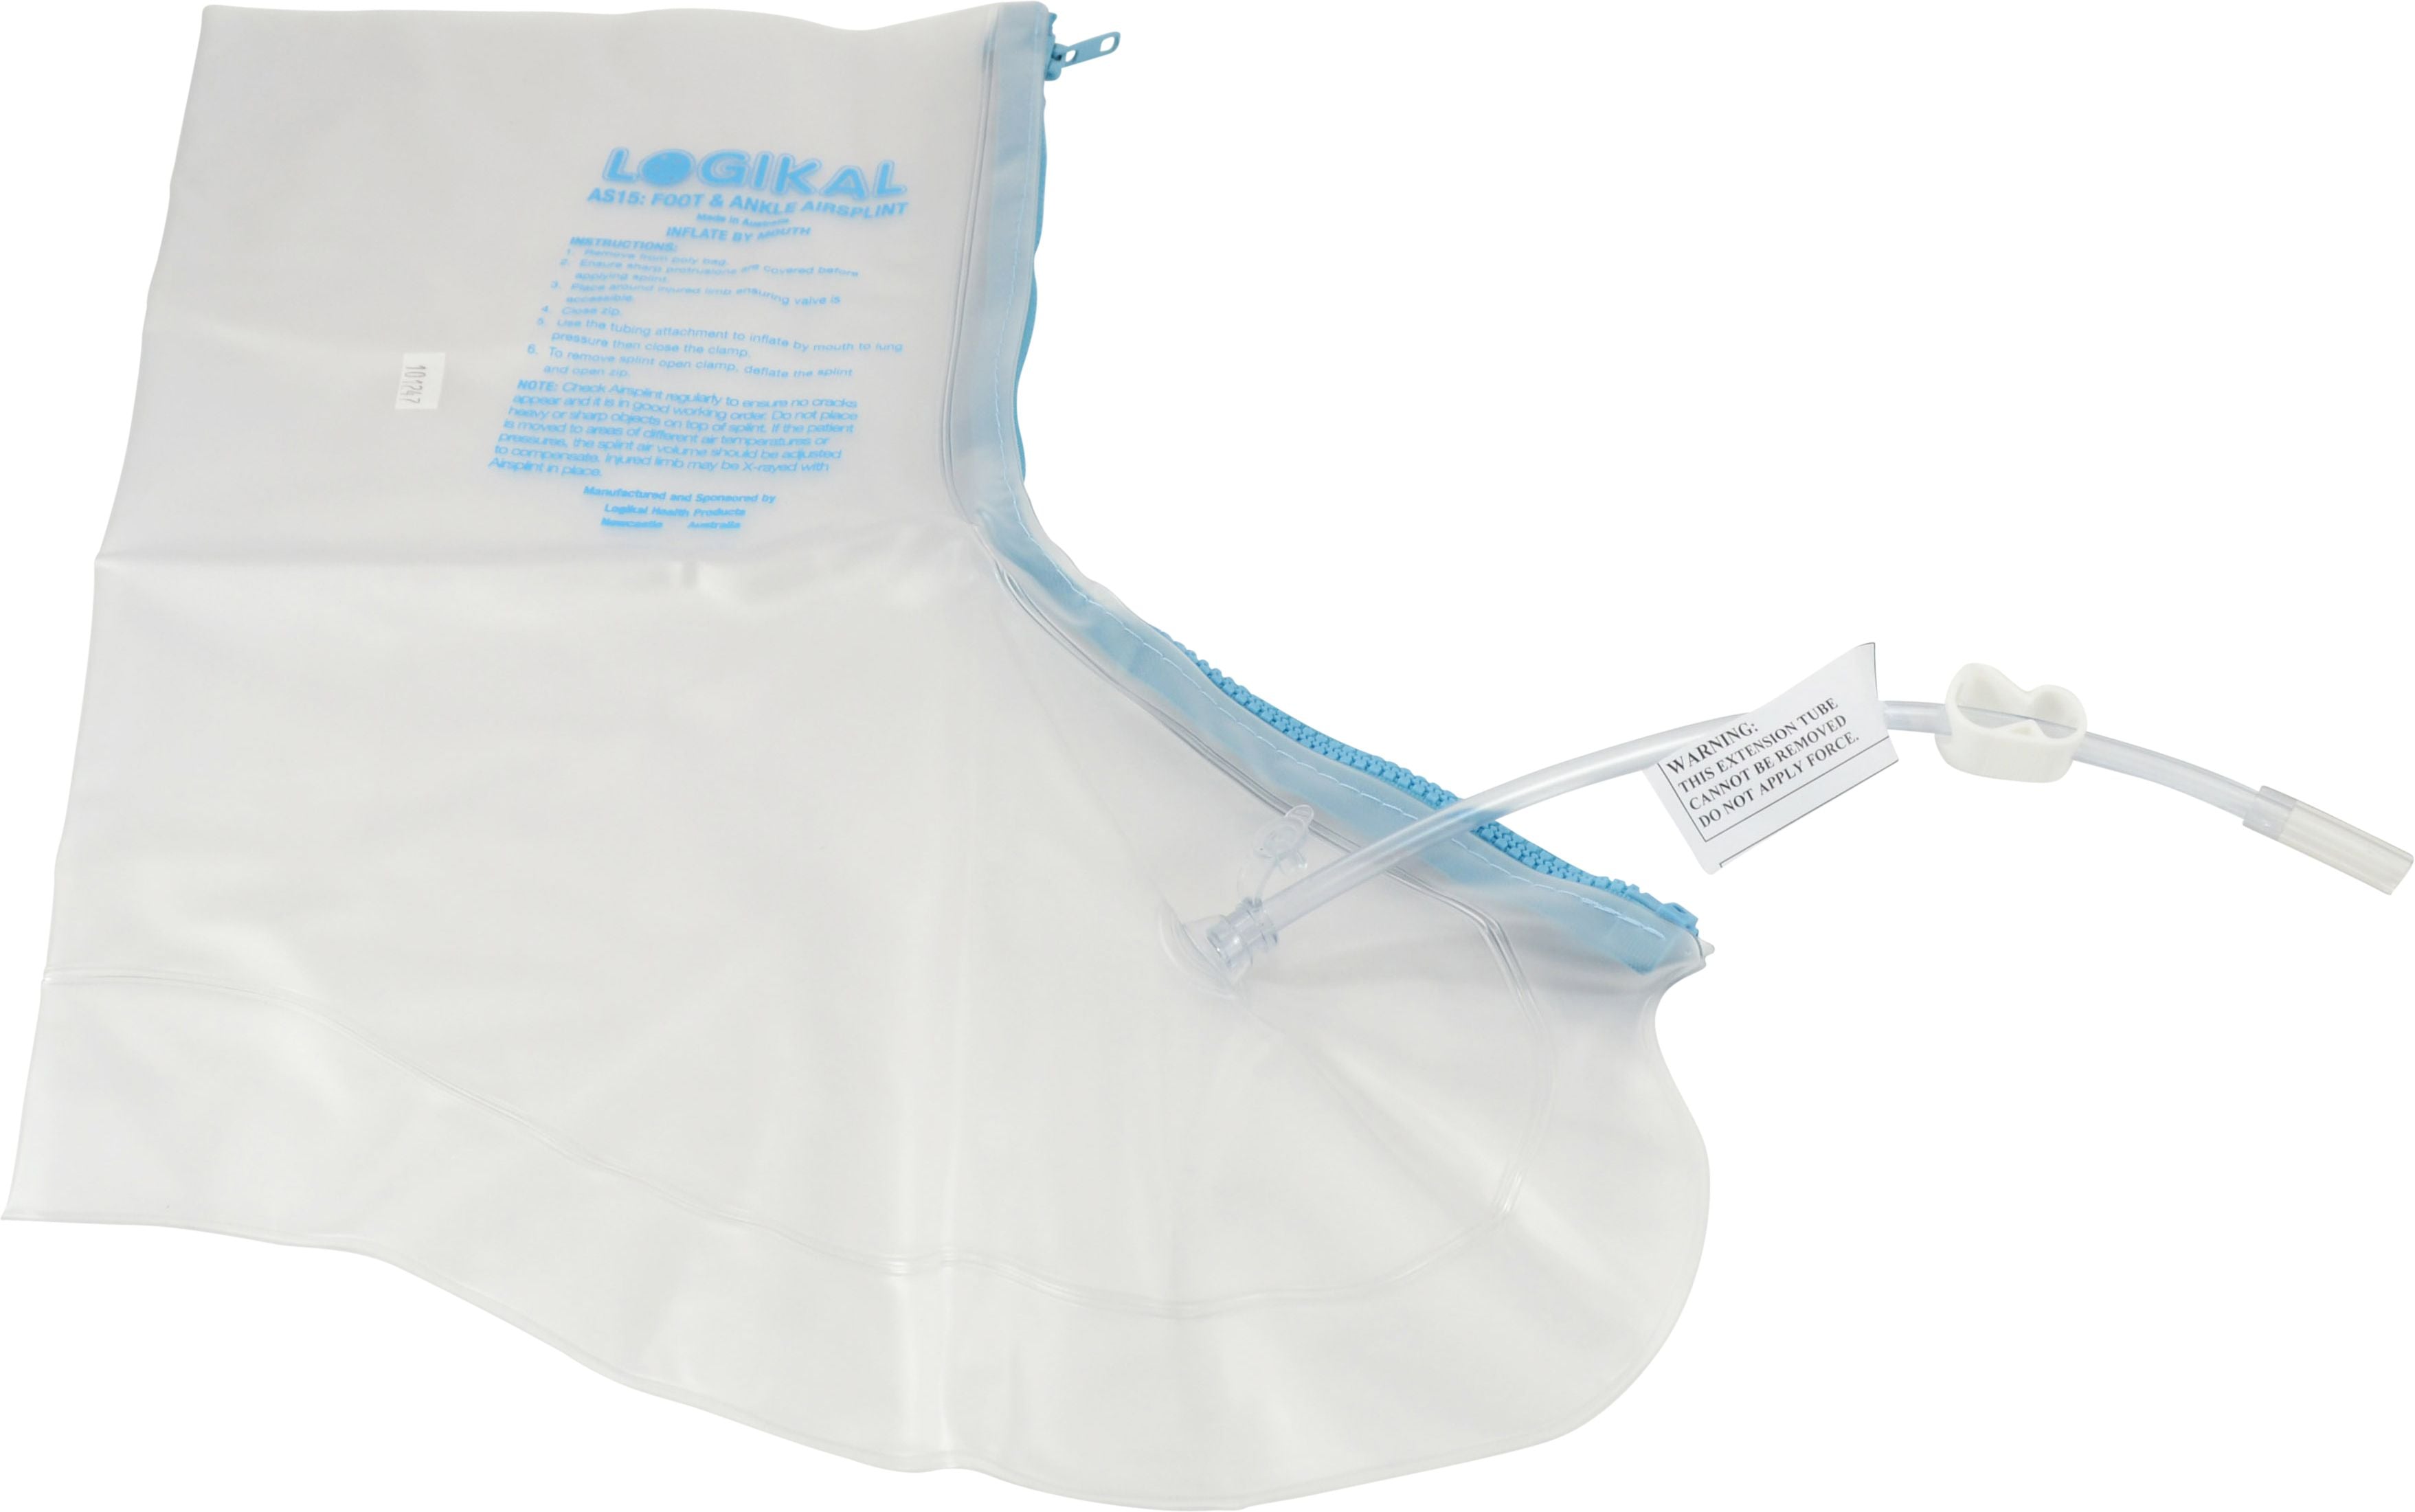
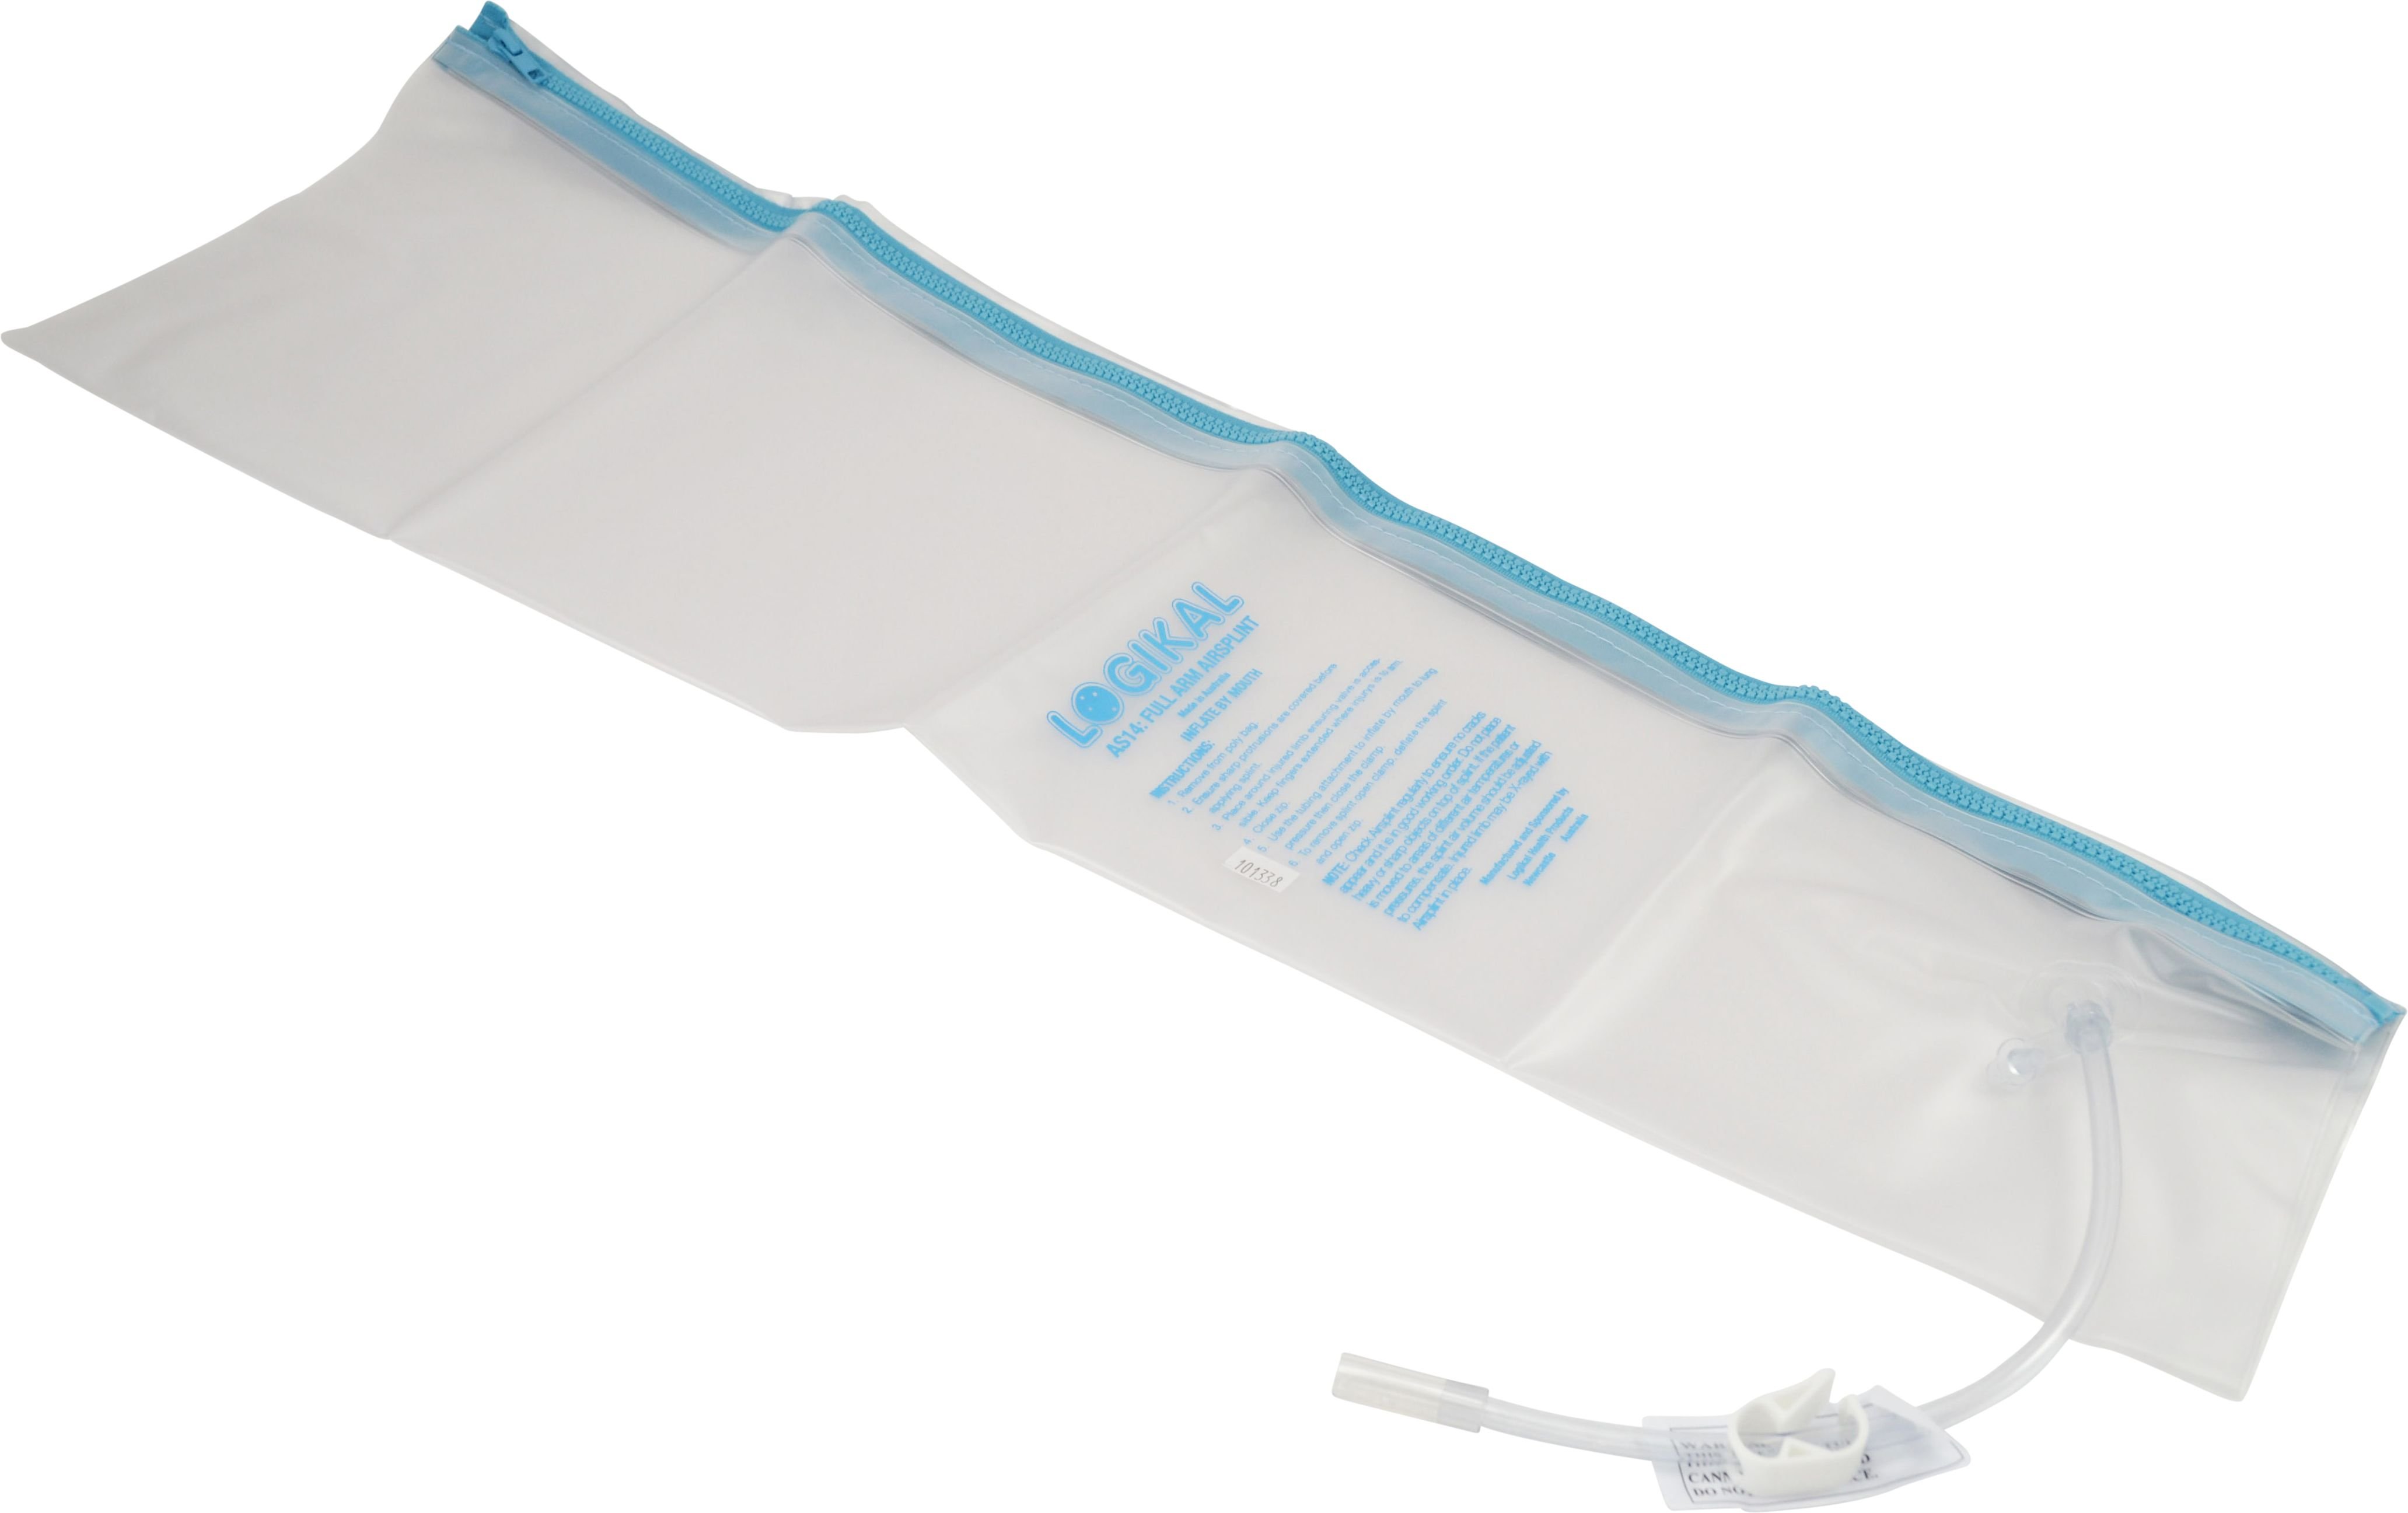
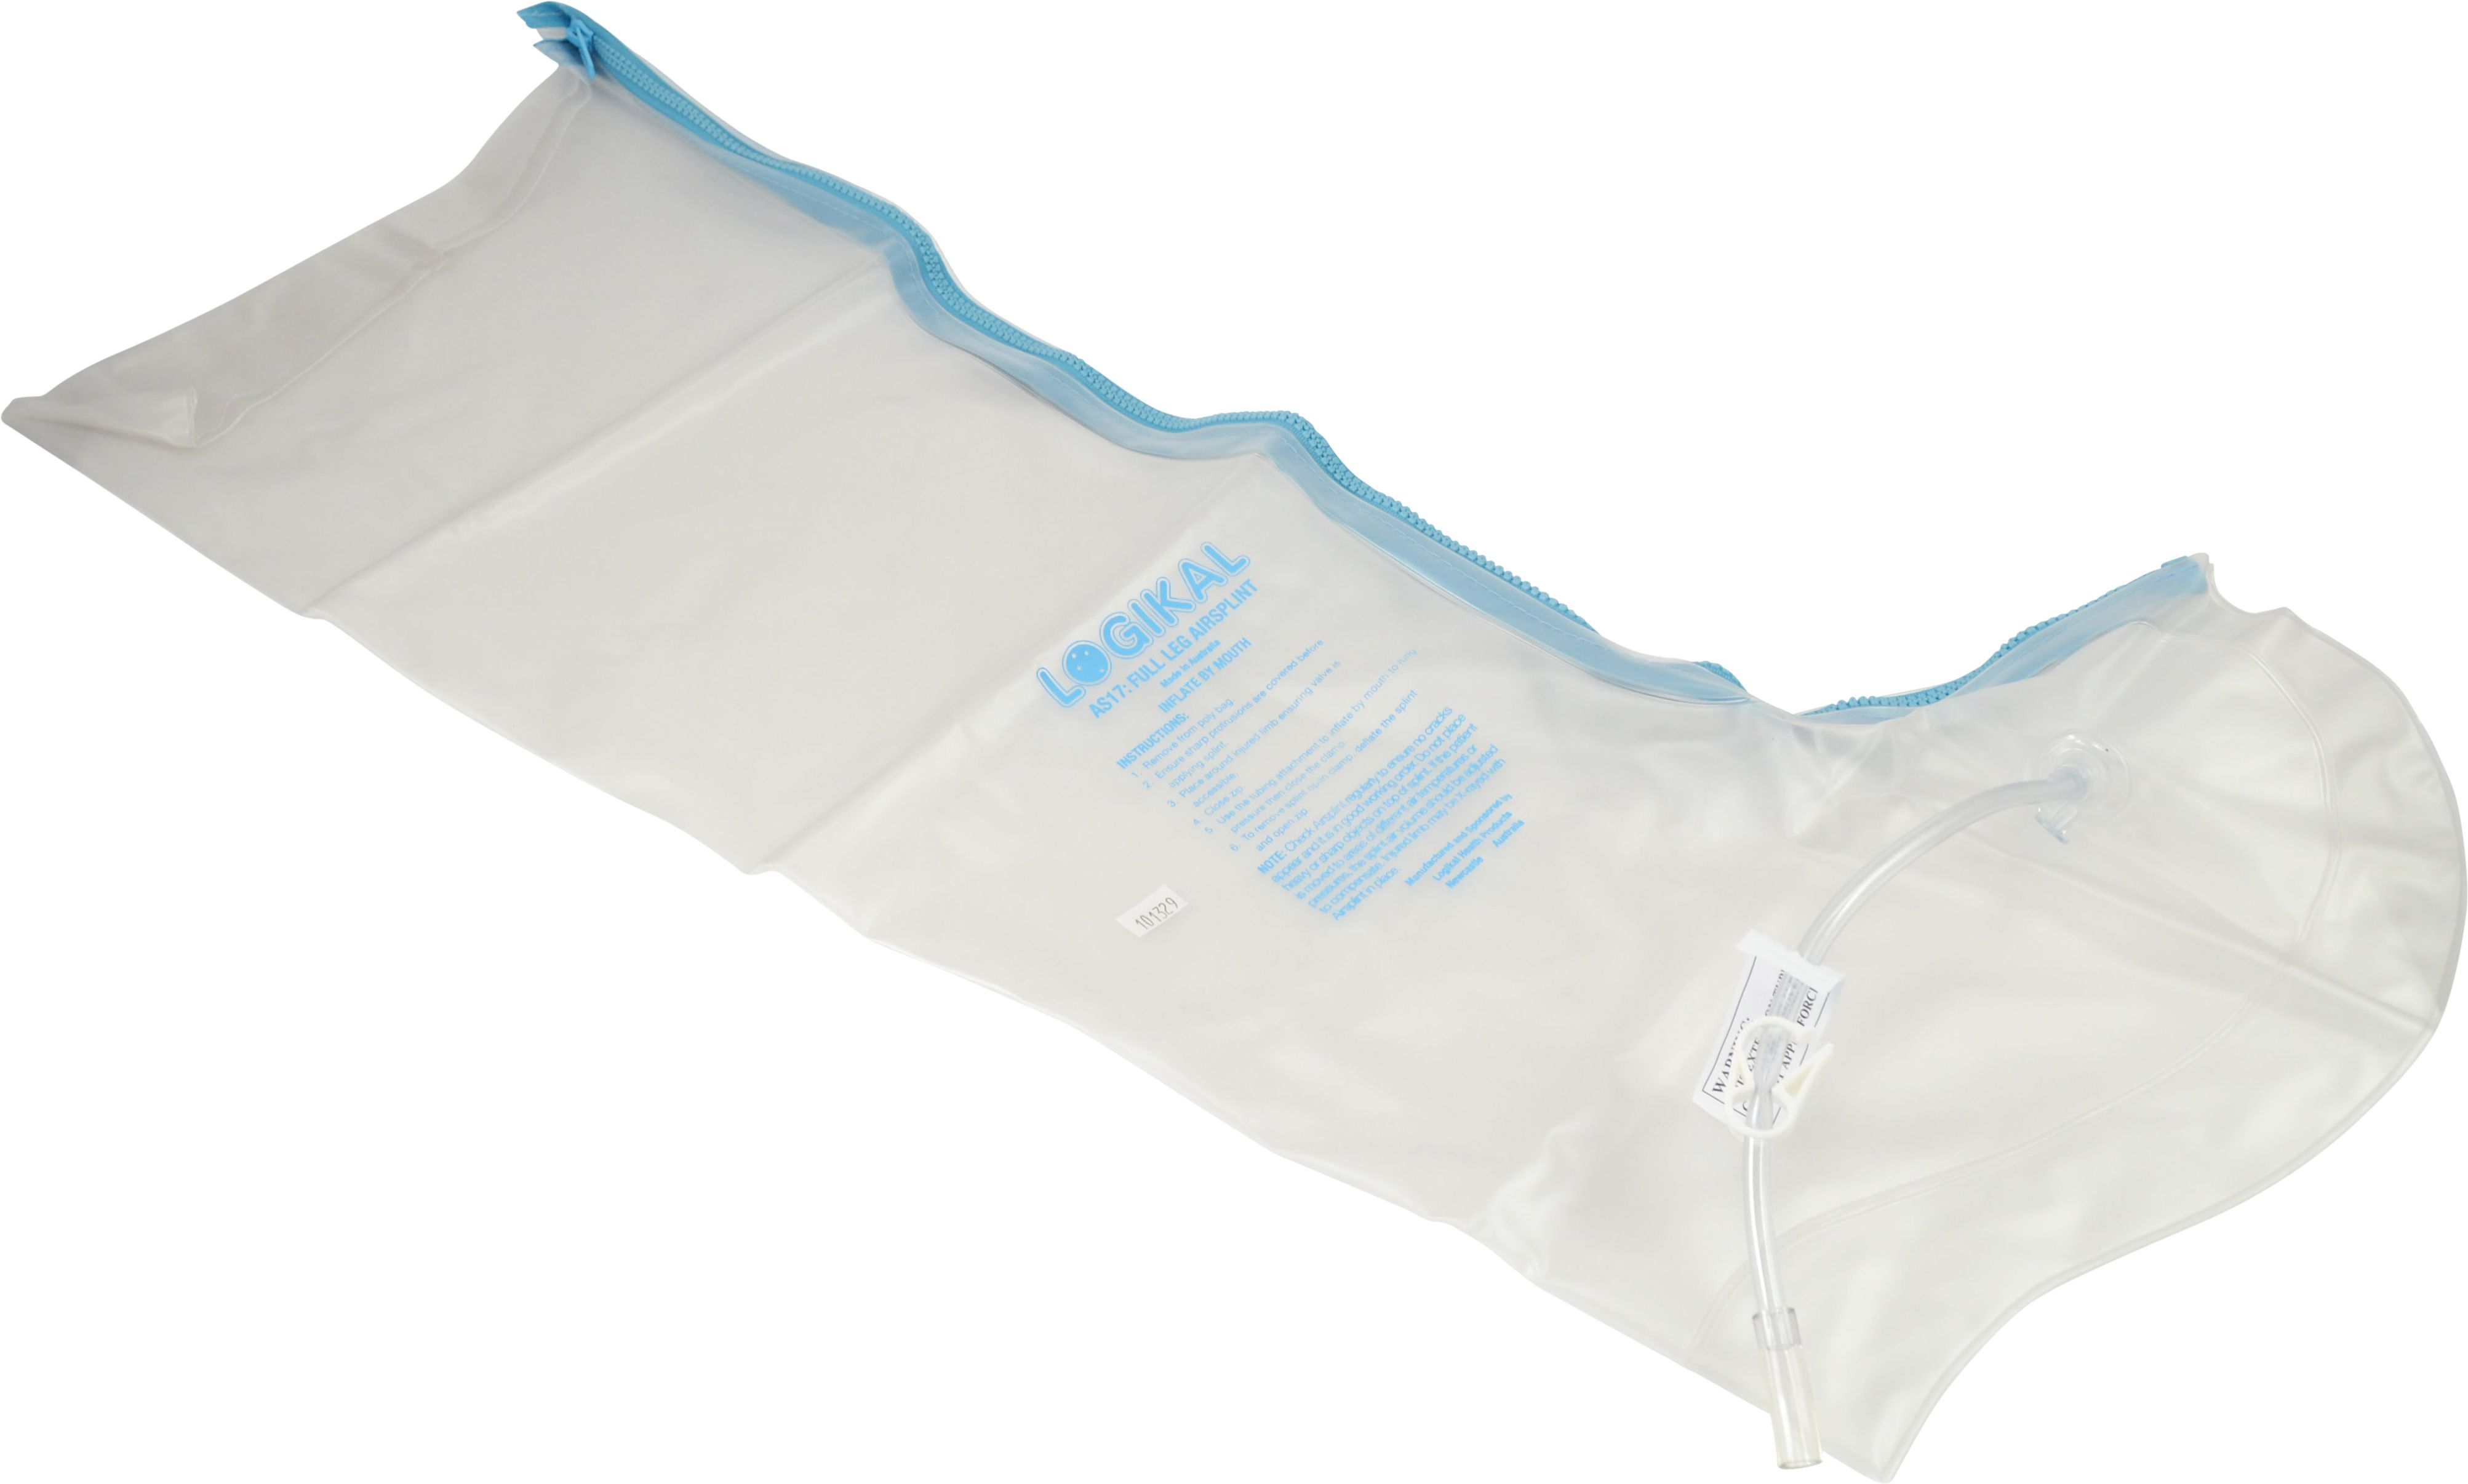
Air splints
Inflatable transparent splints. Slip the deflated splint over the limb, position correctly, then inflate by mouth to firm-but-not-tight pressure. Transparent so you can monitor circulation and skin colour underneath. Great for transport scenarios.
- Foot and ankle: an air splint for foot and ankle stabilises lower-leg fractures and severe ankle sprains.
- Full arm: a full-arm air splint covers wrist through elbow fractures.
- Full leg: a full-leg air splint handles tibia/fibula fractures down to the ankle.
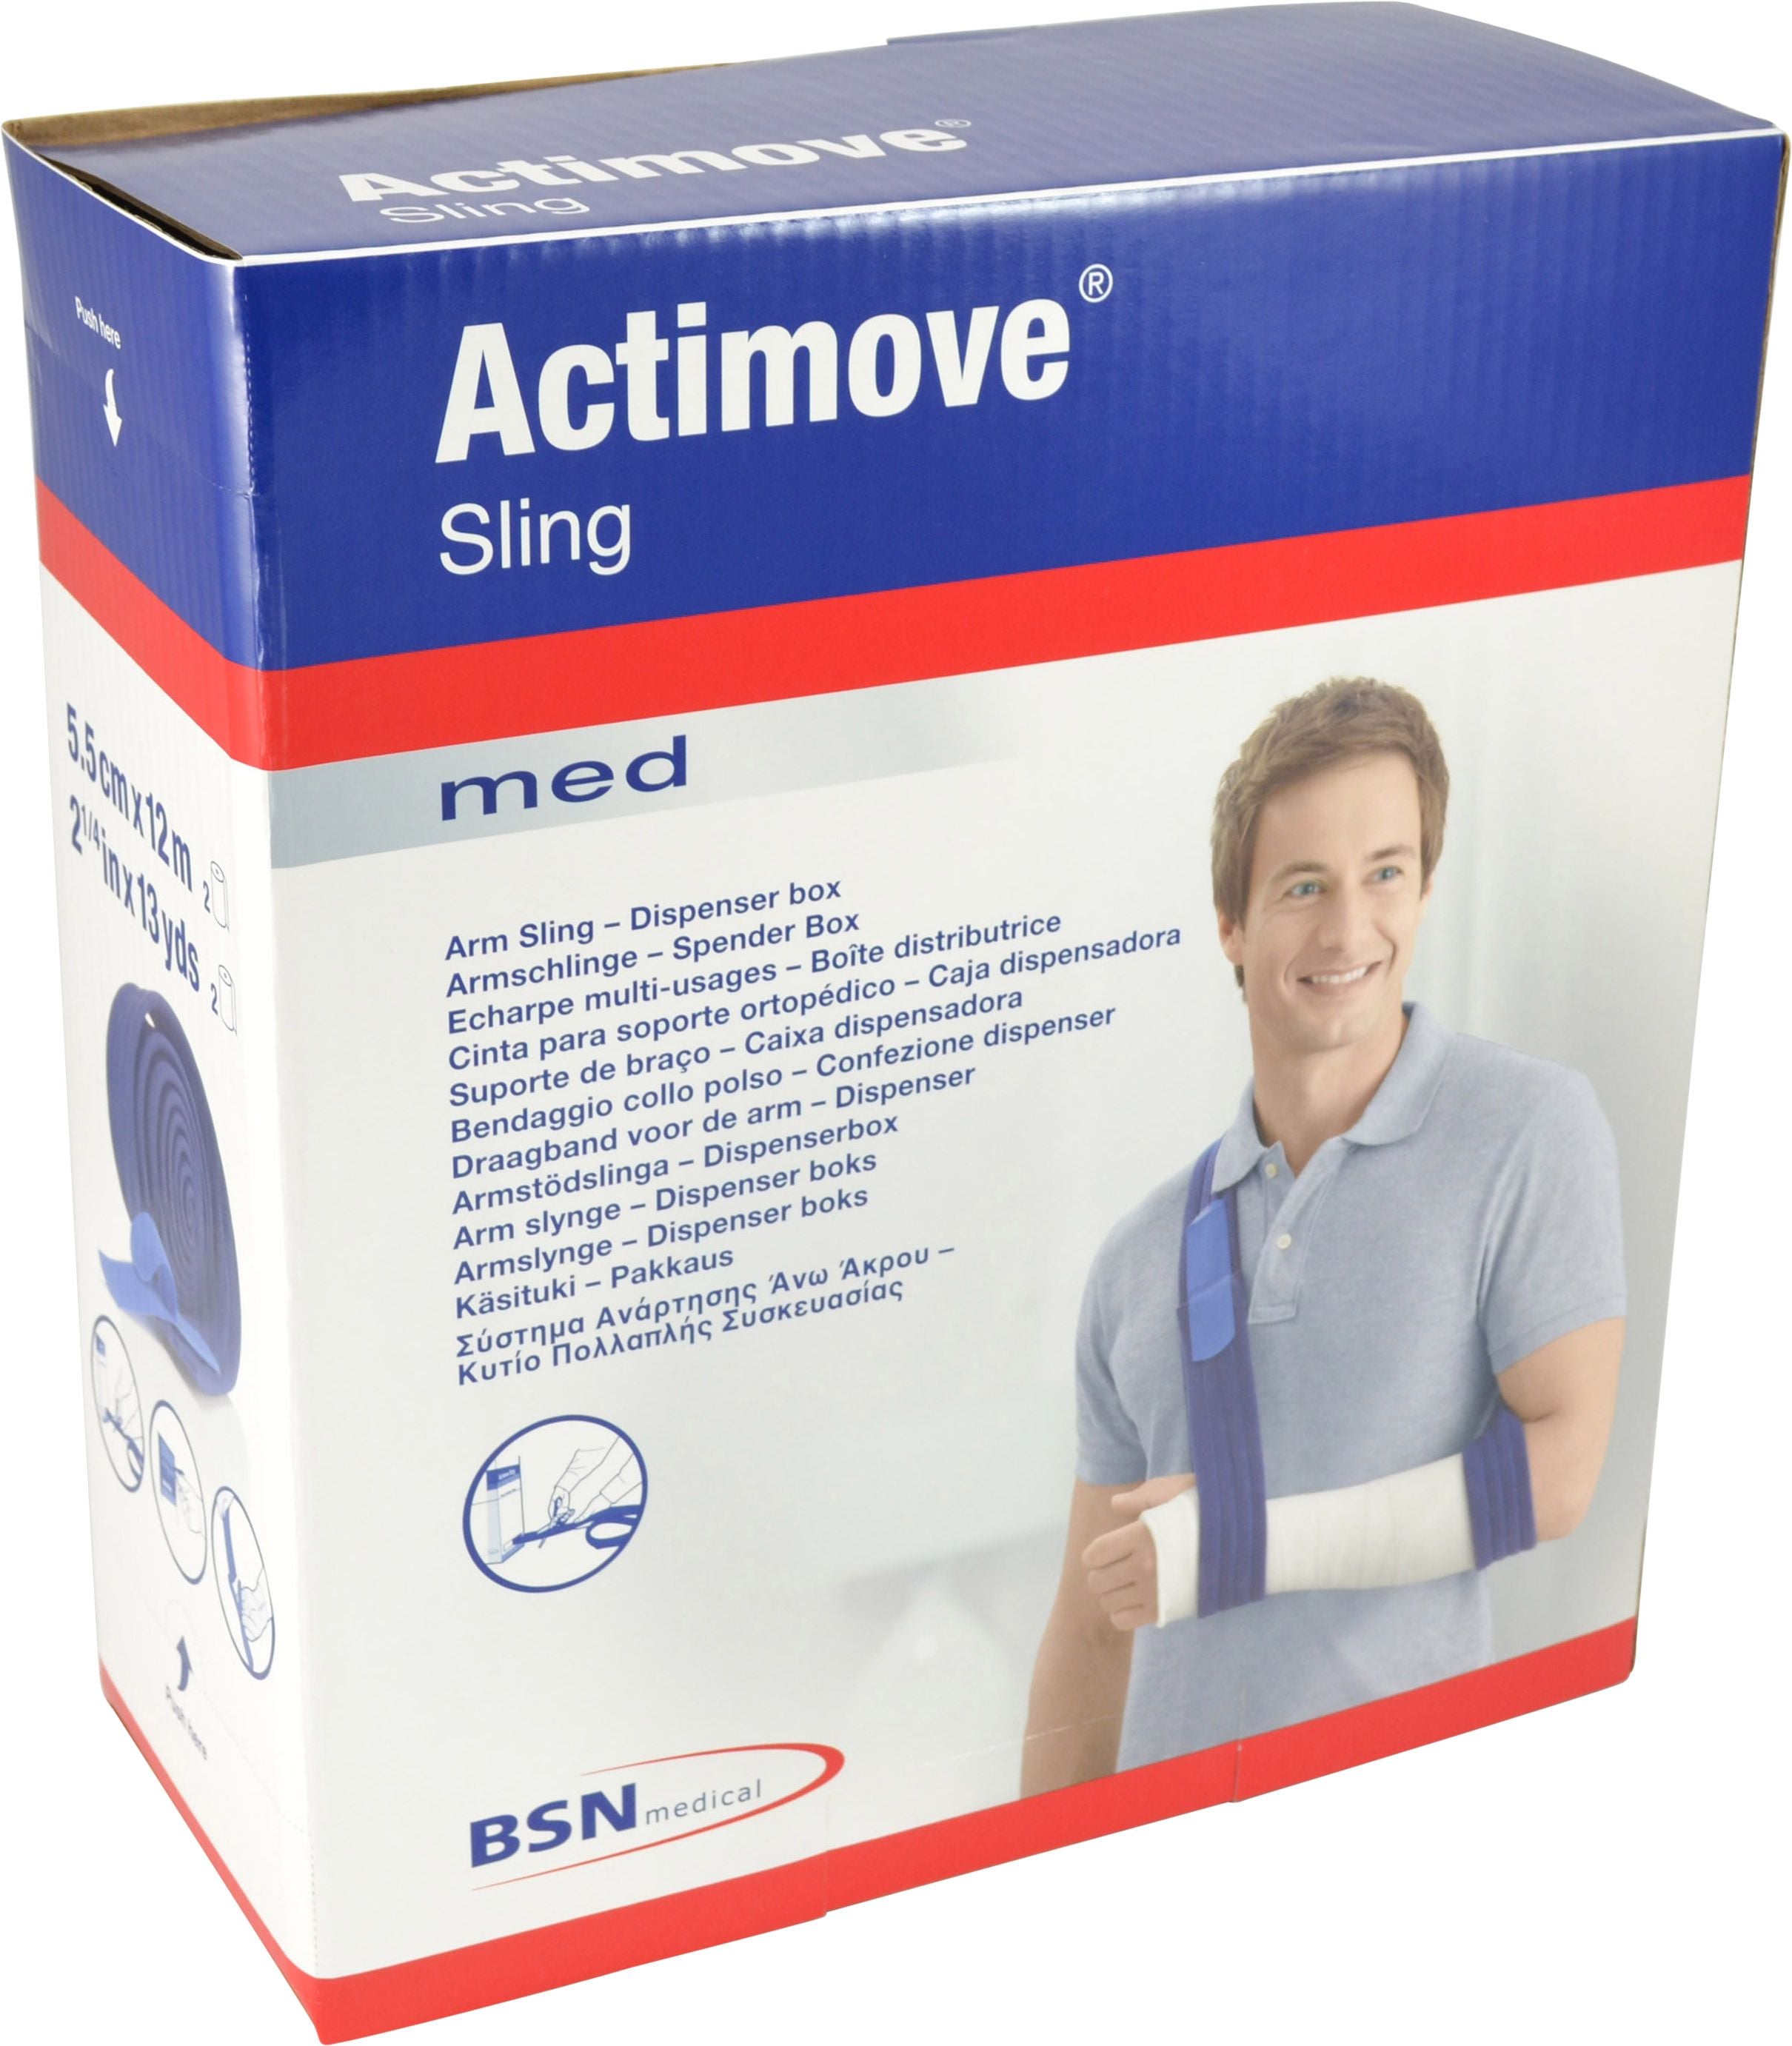
Slings for upper-limb fractures
Once an arm fracture is splinted, a sling supports the weight off the shoulder. Actimove tubular sling material stretches over a splinted limb and gives a clean, even support — better than triangular bandages for longer transport.
Improvised splints
In remote scenarios with no kit, the principles still apply: rigid material (board, rolled-up newspaper, walking stick), padded with cloth, secured with bandage or torn fabric. Splint the joint above AND the joint below the suspected fracture.
Step-by-step splinting technique
The fundamentals don’t change between aluminium and air splints — only the medium.
Before you start
- Check ABC — airway, breathing, circulation — first. A fracture isn’t the only injury.
- Check pulse, sensation, colour below the injury BEFORE splinting. Record what you find.
- Don’t straighten a deformed limb unless circulation is compromised and help is more than an hour away — even then, only if you’ve been trained.
- Expose the injury by cutting clothing rather than pulling it off.
Splinting an arm or leg
- Pad the splint with cloth or gauze, especially over bony points (wrist, ankle, elbow).
- Place the splint alongside the limb in the position it’s found in — don’t force a new angle.
- Immobilise the joint above and the joint below the suspected fracture.
- Secure with bandage — firm enough to hold, loose enough to fit a finger between bandage and skin.
- Re-check circulation after splinting. If pulse weakens or fingers/toes go blue, loosen the splint.
Applying a sling
- After the arm is splinted, slip the sling under the wrist (not the hand) and up over the opposite shoulder.
- Position so the hand sits slightly higher than the elbow.
- For collarbone or upper-arm fractures, add a swathe — a bandage around the chest and over the splinted arm — to stop swing.
Common splint applications
Wrist or forearm fracture
A 90cm folded aluminium splint cut to forearm length, padded under the wrist, bent gently to follow the natural arm position. Secure with conforming bandage from fingers to mid-upper-arm, then sling.
Ankle fracture or severe sprain
An air splint over the foot and ankle, inflated to firm pressure. Boot or shoe stays on if cutting it off causes more movement — cut it off only if circulation is compromised.
Suspected hip or femur fracture
Don’t move the patient. Pad alongside both legs and tie them together at ankle, knees, and thighs — using the uninjured leg as a splint for the injured one. Call 000 immediately. This is a 000 call regardless — femur fractures bleed heavily into the thigh.
Finger fracture
Buddy tape the injured finger to the next one, or use a small section of foam splint cut to fit. Sling not needed.
When to call triple zero (000)
- Open (compound) fracture — bone visible through skin.
- Suspected spine, neck, head, hip, or femur injury.
- Loss of pulse, sensation, or colour below the injury.
- Severe bleeding alongside the fracture.
- Patient is in shock — pale, sweaty, fast pulse, confused.
- Multiple injuries, or any injury where the patient can’t be moved safely.
For all other fractures, a GP or ED visit within a few hours is appropriate — splint first, then transport.
Building a fracture & immobilisation kit
The minimum first aid splint kit for a remote workplace or family bushwalking kit:
- 1x 90cm aluminium foam splint (cut-to-fit for arm or leg).
- 1x 45cm junior splint for children.
- 1x air splint (foot-and-ankle is the most-used size).
- 1-2 triangular bandages for slings and swathes.
- 2-3 conforming bandages for securing splints.
- Scissors and surgical tape.
Browse the full bandage and splint range on Medibc to bundle a kit for your context.
Frequently asked questions
Should I straighten a deformed limb before splinting?
Generally no. Splint the limb in the position you find it. Straightening a deformed limb is only attempted when (a) the limb has lost pulse or sensation, (b) help is more than an hour away, AND (c) the rescuer has been trained in the technique. Forcing alignment without training can cause nerve and vessel damage. Splint in position, monitor circulation, call 000.
How tight should a splint bandage be?
Firm enough that the splint doesn’t shift, loose enough that you can slide a finger between the bandage and the skin. Re-check circulation (pulse, sensation, colour below the splint) every 10-15 minutes during transport. If toes or fingers go cold, blue, or numb, loosen the bandage immediately — swelling can tighten a correctly-applied splint into a tourniquet.
Are air splints better than aluminium splints?
Different jobs. Air splints are easier for less-trained rescuers and give clear visibility for circulation checks — ideal for transport. Aluminium foam splints are more versatile (cut to fit, mould around angles), faster to apply, and don’t need inflation. Most workplace and outdoor kits carry one of each.
Splint smart, transport safely
A correctly applied splint stops a bad fracture from getting worse. Match the splint to the injury, immobilise the joint above and below, and re-check circulation every few minutes. For anything that looks open, deformed, or arrives with shock symptoms, call 000 before splinting takes priority.
Sources: healthdirect — Broken bones first aid, Australian Institute of Health and Welfare — Injury data, St John Ambulance Australia — First aid fact sheets.
Splint & Immobilisation Essentials
Aluminium foam splints, air splints, and slings to safely immobilise fractures and severe sprains.