Written by the MediBC medical-supply team · Reviewed against Safe Work Australia first-aid guidance and healthdirect injury-management content · Updated June 2026.
Scissors, forceps and tweezers are the four small tools every Australian workplace and home first aid kit should contain — and the four tools that get bought wrong most often. A kitchen scissors is not a Lister bandage scissors. A cosmetic tweezer is not a fine-tip forceps. The wrong instrument turns a 30-second splinter removal into a finger laceration.
This guide explains which instrument does what, when to choose stainless steel versus disposable plastic, how to sterilise reusables correctly, and what your kit must hold to meet the model Safe Work Australia first-aid Code of Practice expectations. It maps to the six standard AEROINSTRUMENTS items most well-stocked Australian kits carry.
Why instrument choice matters in first aid
Instruments are the precision tools of a first aid kit. Bandages cover, dressings absorb, but instruments do the small careful tasks that need controlled force in a small space: cutting off a bandage near skin, gripping a splinter without crushing it, removing a tick without leaving mouthparts embedded. The cost of using the wrong tool is rarely catastrophic but always slows the job and sometimes adds a second injury.
Two-instrument rule of every basic kit
Every basic kit needs at minimum: one bandage scissors (preferably Lister with a probe tip), and one forceps or tweezers. Anything less and you cannot remove a soaked dressing without restarting the bleed, and you cannot remove a splinter without enlarging the wound.
Four-instrument rule of a workplace kit
A WHS-compliant workplace kit should contain: blunt/blunt general scissors, Lister bandage scissors, blunt-tip forceps for general grip, fine-tip forceps for splinters and small foreign bodies. Some workplaces add magnifying forceps and disposable plastic forceps for specific scenarios.
Scissors: blunt/blunt versus Lister bandage
The two scissor types in a workplace kit are not interchangeable. Each is designed for a different task and using the wrong one in the wrong place adds risk.
Blunt/blunt general scissors (13cm)
Both blade tips are rounded. The scissor handles are straight. Used for cutting tape from a roll, trimming gauze to fit a wound, cutting a triangular bandage to length, opening sterile packaging, snipping cordage. Should not be used to cut clothing or bandages off a casualty — they have no probe tip to protect underlying skin.
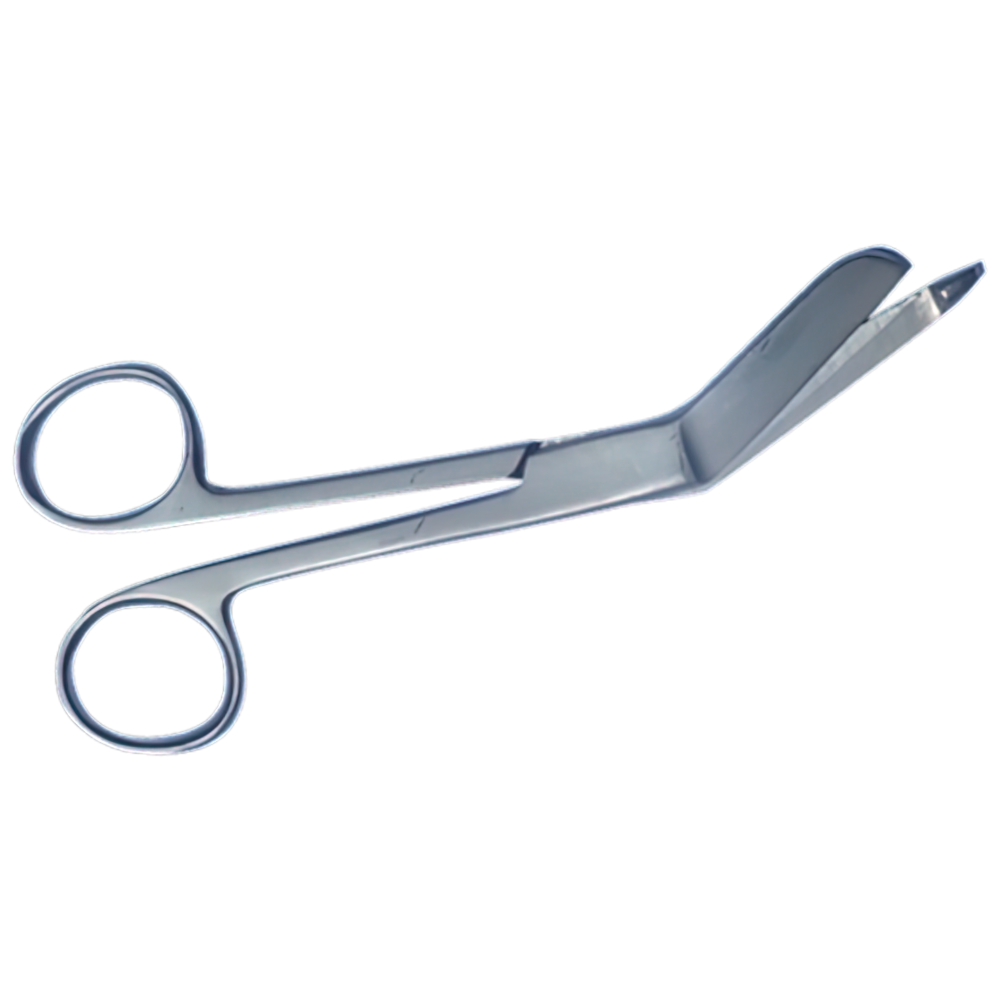
Lister bandage scissors (14cm)
One blade ends in a flat blunt probe tip with a slight bulb. The handles are angled so the blade lies parallel to the casualty's skin when the user holds the scissors normally. You slide the probe tip under the bandage, then cut without lifting the bandage away from the skin. The probe tip cannot puncture skin even under force.
When to choose which
If a casualty is wearing the dressing or bandage, use Lister. If the casualty is not wearing it (you are preparing materials before application), blunt/blunt is faster and gives a cleaner cut. Workplace kits should carry both because both jobs come up.
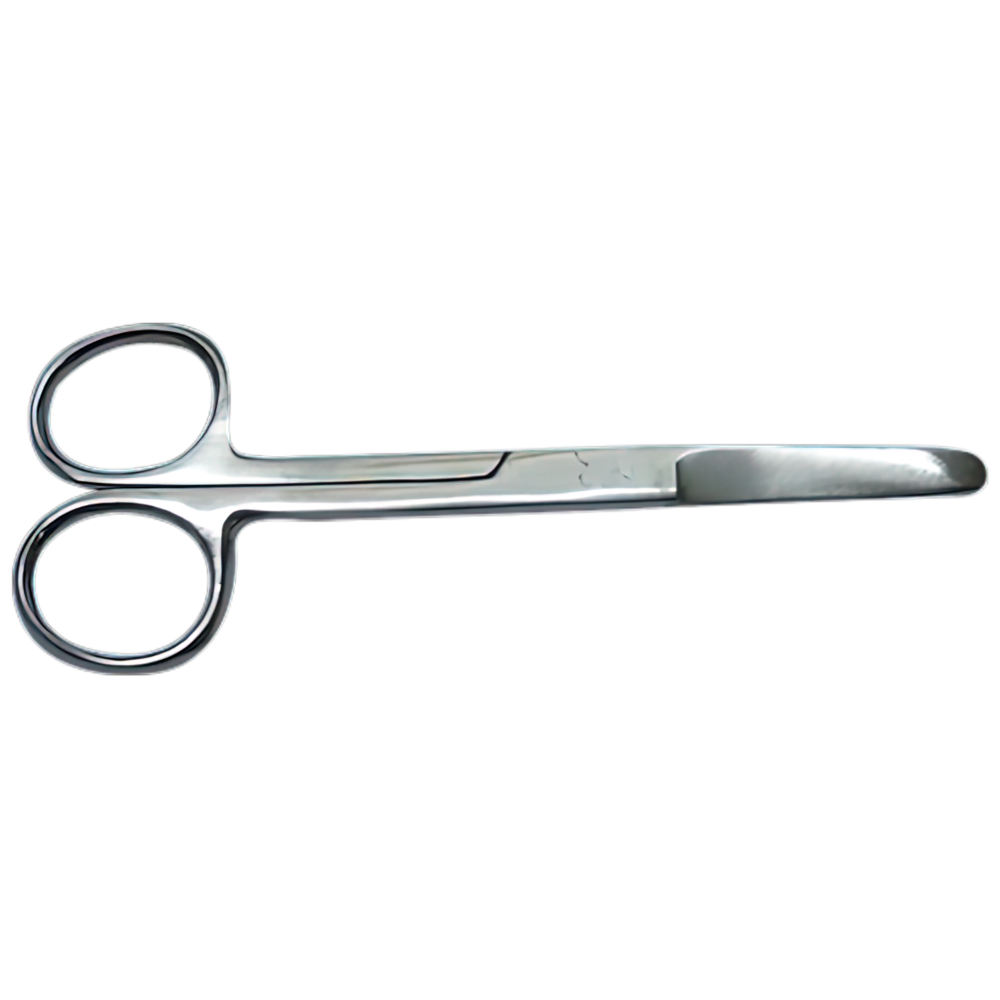
Forceps: blunt-tip versus fine-tip
Forceps are the spring-tensioned grip tools. They lock when you press them together and release when you let go. The tip shape determines what you can pick up safely.
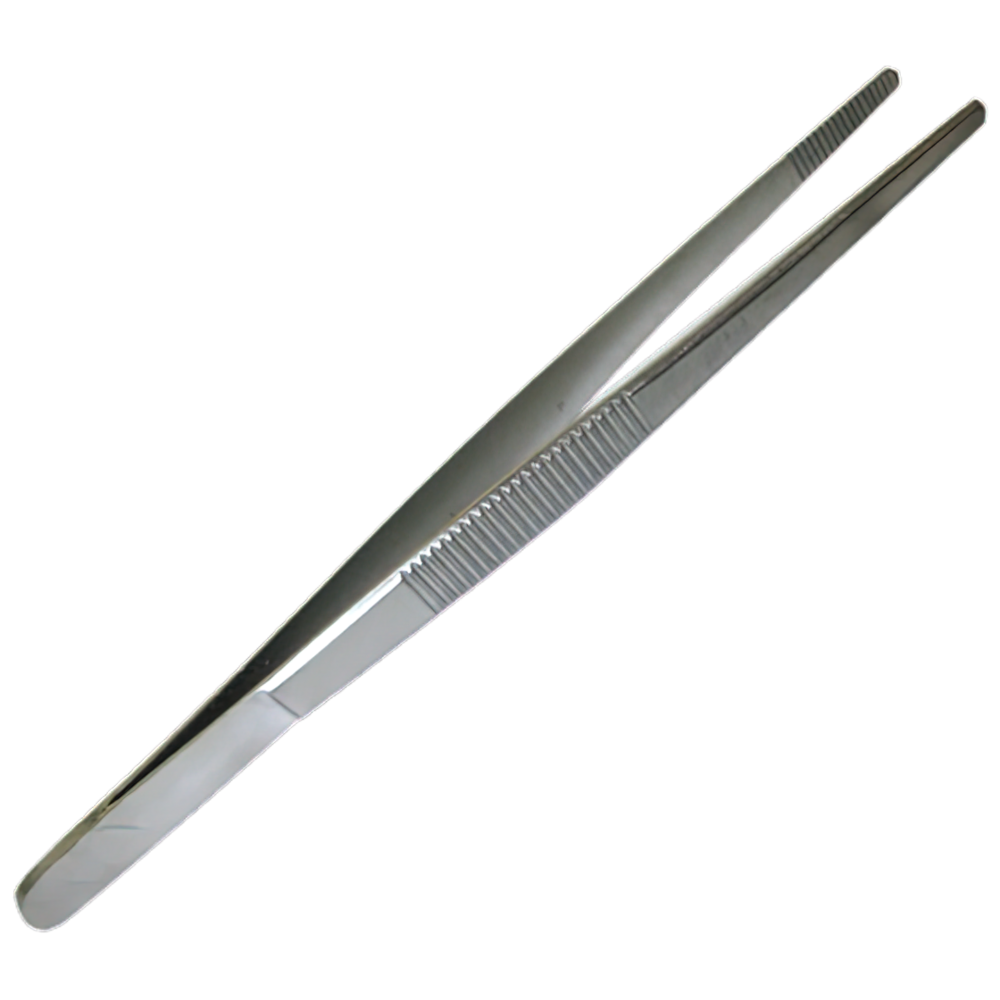
Blunt-tip forceps (13cm)
Rounded tips, broad gripping surface. Used for picking up dressings from a sterile field without contaminating them, transferring gauze swabs during a dressing change, holding a wound edge open momentarily during inspection. Cannot puncture or scratch the patient even with firm pressure — appropriate for sterile-field work where contamination matters more than micro-precision.
Fine-tip forceps (8cm)
Pointed precise tips with anti-slip serrations on the inside surfaces. Used for splinter removal, glass fragment extraction, fish hook handling, tick mouthpart removal. The shorter 8cm length gives finer hand control for small-target work, and the serrated inside grip stops a smooth splinter from slipping during extraction.
Why two sizes matter
A 13cm blunt forceps cannot grip a 2mm splinter. An 8cm fine forceps would crush a folded gauze swab and is too short for sterile-field transfer. Workplace kits need both.
Magnifying-glass forceps: when integration matters
Magnifying forceps combine a 2-3x lens with a fine forceps tip. The user sees the magnified target through the lens while their hands operate the forceps below — both vision and grip working in coordination on the same fine target.
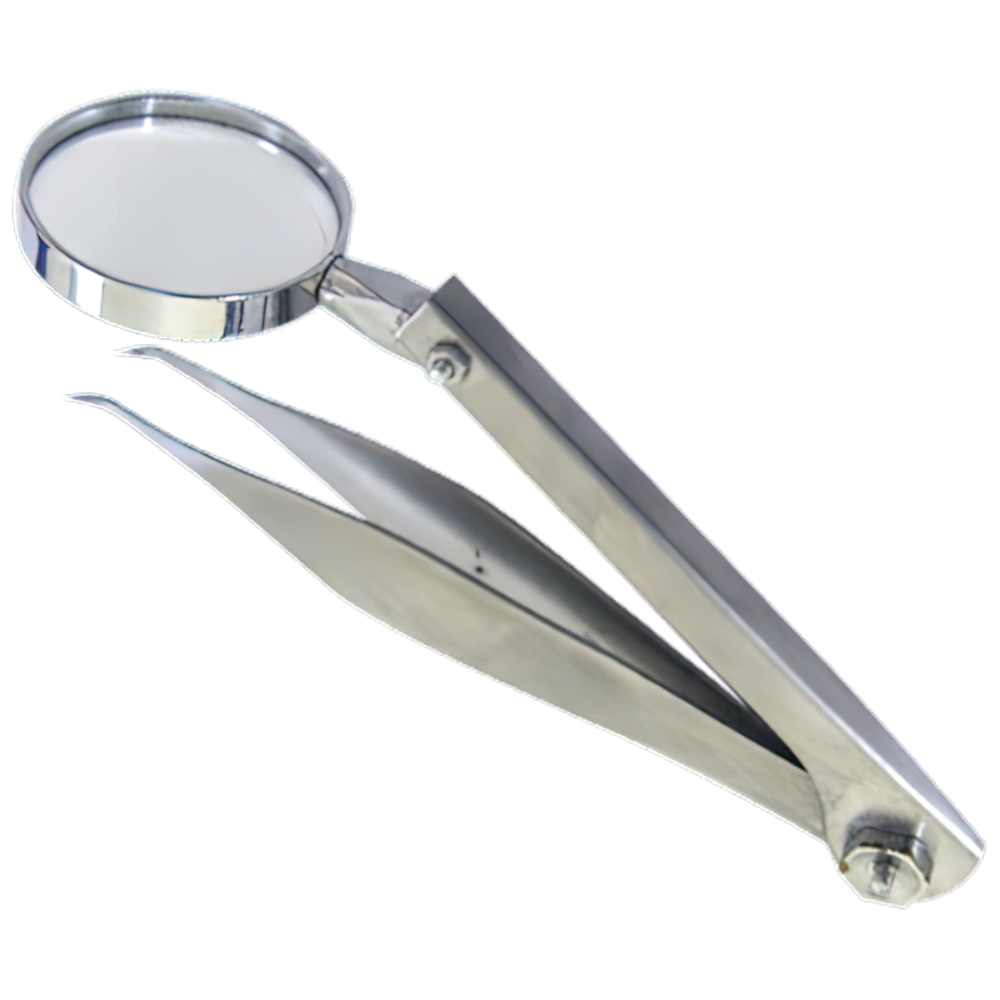
The classic use case: small splinters
A 2-3mm wood or fibreglass splinter is hard to see clearly with the naked eye, especially on pigmented skin or under fluorescent workshop lighting. Magnifying forceps let one person do the whole removal — see and grip — without needing an assistant to hold a separate magnifier.
Tick removal in field settings
Australian paralysis ticks (Ixodes holocyclus) have small mouthparts that break off easily and embed under the skin. Magnifying forceps let the first aider see exactly where the mouthparts are during slow upward traction — essential for getting the tick out intact.
Foreign body assessment in the eye
Magnifying forceps assist visual assessment of a foreign body under the lower eyelid or on the conjunctiva — but actual removal of an eye foreign body should be performed by a clinician unless it is loose and easily picked up on a damp swab. Embedded eye foreign bodies need emergency care.
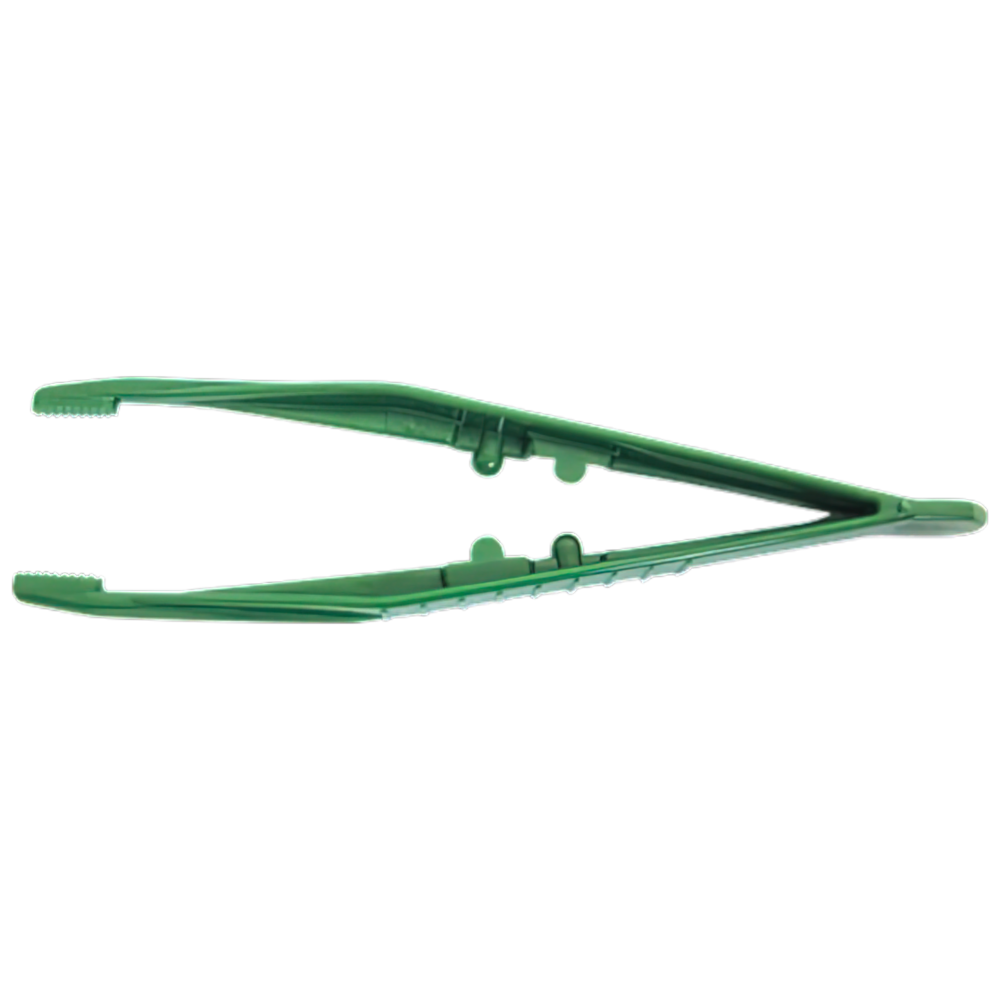
Disposable plastic forceps: when not to reuse
Stainless steel is reusable; plastic forceps are not. The scenarios where plastic wins are specific.
Unknown infection risk
If you are treating a stranger with no medical history available, or a casualty in a high-risk infection setting (homeless outreach, refugee response, suspected blood-borne virus exposure), a disposable plastic forceps eliminates the cleaning-and-sterilisation cycle that would otherwise be required. Use, then discard.
Remote or austere environments
Bush camping, four-wheel drive expeditions, remote mining sites where running water and sterilisation are not available. Use the disposable, dispose of it in a sharps-style container.
Bulk-pack workplaces
Education settings (schools and childcare), large workforces with high incident volume, public-event medical posts. Disposable plastic forceps in a wall-mounted dispenser scale to throughput in a way that stainless steel does not.
What plastic forceps cannot do
Plastic deforms under load. They are unsuitable for tasks needing firm precision grip — embedded splinters in calloused skin, deep glass, fish hooks. Stainless still wins for any task needing real force on a small target.
How to remove a splinter correctly
Splinter removal is the single most common workplace use of forceps. The technique matters.
Step 1 — clean the area
Wash the splinter site with soap and water, then wipe with antiseptic. Splinters carry surface bacteria into the skin; cleaning first reduces infection risk.
Step 2 — assess the splinter direction
Look at the angle of entry. The splinter must be removed in the opposite direction — never crosswise or perpendicular. Pulling perpendicular snaps the splinter and leaves the deep portion in.
Step 3 — grip with fine forceps
Use fine-tip forceps to grip the splinter as close to the skin as possible. Steady pressure, no twisting. Twisting breaks splinters.
Step 4 — pull in the line of entry
Slow steady pull in the direct line of the splinter. Do not jerk. If the splinter resists, stop — the skin around it may need to be opened slightly with a sterile needle before continuing (or referral to GP).
Step 5 — clean and dress
Re-clean the now-empty hole, apply antiseptic, cover with a small non-adherent dressing. Monitor for 48 hours for any signs of infection.
How to cut a bandage off without nicking skin
Removing a soaked or stuck bandage with normal scissors is how secondary injuries happen.
Always use Lister scissors
The probe tip is non-negotiable. A blunt/blunt scissor has no probe tip and the blade rests on the skin — every cut risks a nick.
Slide the probe tip flat against skin
The probe goes between bandage and skin. Hold the scissors so the angled handle keeps the blade parallel to the skin, not perpendicular.
Cut in 2-3cm increments
Short cuts let you reposition the probe tip between each cut and keep the angle correct. Long cuts in one motion are how the probe tip wanders.
Avoid cutting over wounds
Cut along the side of the bandage away from the wound, not directly over it. If the bandage has dried onto a wound, soak it off with sterile saline rather than cutting.
Sterilising reusable stainless instruments
Stainless steel forceps and scissors last decades if you sterilise them correctly.
After every use
Rinse off blood and debris immediately while still wet — dried blood is much harder to remove. Use cold or lukewarm water (hot water sets protein onto the instrument).
Detergent wash
Wash with detergent and a small instrument brush in warm water. Pay attention to the joint pivot and any serrations — that is where blood and tissue hide.
High-level disinfection
Soak in 70% isopropyl alcohol for at least 10 minutes, or use a chlorhexidine 0.5% solution. Rinse with sterile water and air-dry on a clean towel.
Autoclaving (if available)
121C for 15 minutes is the standard hospital autoclave cycle for instruments. Smaller bench-top autoclaves are available for clinics and workplace medical centres. Autoclaving is the only true sterilisation; alcohol soaking is high-level disinfection.
Storage
Sterile instruments go in a sealed instrument tray or autoclave pouch with the date. Re-sterilise after 30 days even if unused — handling integrity is not guaranteed indefinitely.
What WHS rules expect in your workplace kit
The Safe Work Australia model Code of Practice (First Aid in the Workplace) does not specify instrument brands, but it sets the functional requirements every workplace must meet.
Adequate to the assessed risk
Your first-aid risk assessment determines instrument complement. An office can justify the basic two-instrument minimum; a workshop needs the full four; a high-risk site needs all six plus consumables.
Stored in an accessible kit
Instruments must be in the workplace first aid kit, not in a locked cabinet, not in someone's personal toolbox. The kit must be available to any worker who needs it without unlocking or sign-out.
Inspected and maintained
A nominated person inspects the kit at intervals matched to use (monthly to quarterly). Damaged instruments are replaced. Reusable instruments must be sterilised between uses on different casualties.
Common instrument mistakes to avoid
1. Using kitchen scissors as bandage scissors
No probe tip equals nicked skin. Even fast-and-skilled cuts produce small surface lacerations.
2. Reusing a splinter forceps without cleaning
The next splinter removal carries bacteria from the previous removal. Always clean immediately after each use.
3. Stainless instruments left wet
Stainless is corrosion-resistant, not corrosion-proof. Water left between the pivot joint and on serrations causes pitting and ultimately failure.
4. Confusing forceps with tweezers
Forceps spring-load. Tweezers (in the cosmetic sense) are unsprung and rely on user pressure. They are not interchangeable for any precision task.
5. Disposable plastic forceps for a serious extraction
Plastic deforms. For a deep splinter, fish hook or embedded glass, stainless is the only safe choice. Plastic for triage, stainless for the procedure.
Building your instrument complement
Recommendations by workplace category.
Office and retail (low risk)
Lister scissors, blunt-tip forceps, fine-tip forceps. Roughly three instruments cover paper cuts, tape work, minor splinters from displays or printer maintenance.
Light industrial, schools, hospitality (medium risk)
Add blunt/blunt scissors for tape/gauze preparation, magnifying forceps for paediatric splinter removal in schools, disposable plastic forceps for bulk use in school first aid rooms.
Construction, mining, manufacturing (high risk)
Full six-instrument complement, with duplicates for the highest-use items (Lister scissors and fine-tip forceps). Add a small instrument tray and the means to sterilise — alcohol bottles or a small autoclave depending on scale.
Frequently Asked Questions
What is the difference between blunt scissors and Lister bandage scissors?
Blunt/blunt scissors have two rounded tips and are general purpose — cutting tape, gauze, and trimming dressings. Lister bandage scissors have one blunt probe tip that slides under a bandage without cutting skin, and an offset angled handle so the blade stays parallel to the skin. Use Lister scissors any time you cut a bandage off a casualty.
Should first aid forceps be stainless steel or disposable plastic?
Stainless steel for any reusable kit because they sterilise cleanly and last decades. Disposable plastic for single-use scenarios — fielding a casualty with an unknown infection risk, kits where sterilisation is impractical, or single-event tasks like splinter removal at a remote site. Most workplace kits stock both.
How are magnifying-glass forceps actually used?
Magnifying forceps integrate a 2-3x magnifying lens into the handle so the first aider can see fine splinters, embedded glass, or tick mouthparts while gripping with the forceps tips. Particularly useful for paediatric splinter removal where the wood fragment may be 2-3mm and almost transparent against the skin.
How should I sterilise reusable stainless steel instruments?
After every use: rinse off blood and debris, wash with detergent in warm water using a small brush, rinse, dry, and either soak in 70% isopropyl alcohol for 10 minutes or autoclave at 121C for 15 minutes if you have access. Store in a sealed instrument tray. Stainless steel that turns dull or pitted should be retired.
Can I use household tweezers from a kitchen drawer instead?
Cosmetic tweezers are not designed for medical use — they have angled or slanted tips that grip well on hair but slip on splinters, glass and stings. They are also rarely sterilised. Purpose-built first aid forceps have purposeful flat or fine tips, anti-slip serrations on the inner faces, and stainless construction that tolerates repeated disinfection.
Sources and further reading
- healthdirect — Insect bites and stings (tick removal)
- healthdirect — Eye injuries (foreign body management)
- Safe Work Australia — First aid topic page
- TGA — Medical devices regulatory framework
Related guides on MediBC
- Non-adherent dressings and gauze swabs: sizing guide
- Splint sizing guide for workplace first aid kits
- Workplace first aid cabinet guide
Equip your kit — stainless and single-use instruments
The six AEROINSTRUMENTS items every WHS-compliant workplace kit should contain — stainless steel for reusable precision and disposable plastic for bulk single-use needs.
Stainless Lister Bandage Scissors 14cm
Probe-tipped scissors — cut bandages off without nicking skin.
Shop Now
Stainless Blunt Forceps 13cm
Sterile-field forceps for transferring dressings without contamination.
Shop Now